A well-designed landscape enhances your home’s appearance, increases your property value and provides many other benefits. Grass and trees remove carbon dioxide and produce life-giving oxygen while also capturing dust and smoke particles from the air.
Design principles like scale and pacing are important in creating a landscape that feels pulled together. Repetition is key to creating unity, but new elements should be introduced periodically to keep the landscape fresh. Contact Landscaping Boca Raton for professional help.
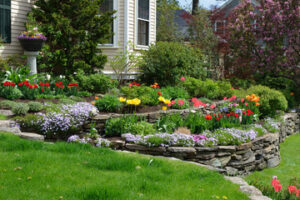
Plants are the foundation of a landscape. They give the garden character and provide visual appeal through color, texture, and form. They are also essential to the health and structure of the landscape. They create a natural habitat for wildlife and improve soil health with their deep roots. Choosing native plants over exotics reduces maintenance and water costs, while providing a more balanced ecosystem in the yard.
Light is another important consideration in the landscape. A variety of factors affects the amount and direction of sunlight that reaches the landscape. Trees, hedges and other plants can act as barriers to sunlight to minimize glare on home windows and furnishings. This allows homeowners to enjoy their outdoor spaces comfortably all year round.
Fragrant flowers, herbs and foliage add to the overall ambiance of a space by infusing the air with pleasant scents. They also enhance a sense of wellness through the touch of soft leaves or the sound of flowing water. Plants with varying textures and heights add interest to the garden, creating depth and contrast in the landscape.
A well-designed landscape will balance the needs of each plant species. Species that are native to the site have greater adaptability to local conditions and can grow faster and stronger than imported varieties. This reduces maintenance and water usage, as well as the need for chemical fertilizers and other chemicals.
Using native plants supports the environment by decreasing pollution from runoff and reducing erosion. They have evolved in a specific habitat and are more resilient to harsh weather conditions, making them a better choice for the landscape. They are also less likely to require irrigation and other watering, as they are adapted to the local climate.
Irrigation
Landscape irrigation is a key element of successful landscaping. It ensures that all plants get the hydration they need to thrive, and it can help prevent water waste by using efficient methods for water delivery. It also makes it possible to plant in ways that can support practical objectives, such as shading buildings or preventing wind erosion.
Professional irrigation systems are designed to save property managers time by automating the process of watering. This allows them to focus on other aspects of managing the commercial space. Irrigation systems are also able to adapt to the unique needs of each landscape, ensuring that water reaches where it’s needed most. This reduces stress on the plants, promoting healthier growth and a more uniform appearance across the landscape.
Efficient irrigation practices can lead to substantial savings on water bills. They can also improve soil health by minimizing the amount of nutrients in runoff and by reducing erosion. In addition, they help protect the environment by minimizing airborne dust and pollen movement outdoors and into indoor spaces.
Optimal landscape irrigation is driven by plant water needs, water availability, and the capacity of soil to store water near root zones. Scheduling should be based on daily crop evapotranspiration estimates and soil moisture measurements to determine when and how much water to apply. Often, the only requirement for shallow-rooted plants is to replenish the top 12 inches of soil moisture.
Regular maintenance activities can eliminate water waste by adjusting sprinkler heads and fixing leaks, which can save gallons of water each year. Well-maintained lawns are less likely to become waterlogged or unhealthy, preserving the investment of time, money, and resources that went into their development.
Lighting
Incorporating landscape lighting creates a stunning visual effect, enhances safety and security, and boosts property value. It’s important to plan and execute a detailed lighting strategy, as the style, type, and placement of fixtures can dramatically impact the finished result.
Properly placed lighting draws attention to design elements and architectural features, highlighting their beauty after dark. For example, a beautiful stone facade might appear stark and unfinished when viewed from the street, but with careful lighting techniques, its texture and color become a dramatic focal point. It can also highlight decorative details, such as carvings and molding, that can be easily missed by passersby during the day.
There are several types of lighting fixtures to choose from, each offering a unique set of benefits. Spotlights are ideal for illuminating individual trees, statues, or other focal points with their tight beams of light. Floodlights are more versatile and can be used to light walls or large areas with their broad beams of light. Low-voltage lights with a “wash” effect are another option for illuminating walls, fences, or other features by creating a soft and diffused glow that’s almost like sunlight washing over the surface.
Uplighting is another technique that can enhance the appearance of a tree by directing light upwards to showcase its silhouette and drama. This is often done by positioning a light at the base of a tree and pointing it up, but can be accomplished with other fixtures as well. Alternatively, backlighting can be used to produce an array of striking effects such as sunbursts, shadowing, and rim lighting by placing a light behind a subject. A good landscape designer will understand these different lighting options and how to implement them in your space.
Water Features
Imagine sitting in your backyard, surrounded by the serene sounds of water trickling, birds chirping and the soft glow of moonlight dancing on the surface of a pond. With a landscape feature like this, you can create a space that evokes the same sense of tranquility you experience when relaxing at a spa. This is because water features are more than just decorative pieces; they engage your whole landscape, transforming it into a beautiful and peaceful retreat.
Water features are nature’s white noise machines, masking unwanted noise and promoting relaxation. They can also help with air quality, as the moisture from the flowing water nourishes plants and helps to balance humidity levels. Adding a water feature to your landscape will also attract wildlife, from birds and butterflies to frogs and dragonflies. These creatures are a delight to watch and will add a wonderful touch of charm to your backyard.
There are many different types of water features to choose from, including fountains, jeux d’eau, ponds, rills, streams and waterfalls. The best option for your landscape will depend on your aesthetic preferences and the amount of space you have available. Modern water features are typically self-contained, requiring no plumbing since the water is recycled through a pond or hidden reservoir known as a sump.
Water features can be incorporated into any landscape, from small spaces to sprawling estates. The initial cost will vary depending on the size and style of the feature, but a well-designed water feature will increase your curb appeal and property value. Homebuyers are looking for outdoor spaces that feel like an extension of their indoor living spaces and will be attracted to the beauty and tranquility of a well-maintained water feature.
Hardscaping
Hardscaping involves using non-plant elements to add structure and appeal to a landscape. Some examples include stone pavers, retaining walls, paved pathways and patios, natural rock features like boulders or decorative rocks, wood structures like pergolas and decks, and even concrete slabs used for outdoor flooring.
Incorporating these hardscape elements can bring the space together and provide a seamless transition between the soft and hard aspects of your yard. It’s important to consider the maintenance and care requirements of each material when creating a hardscape as some require more attention than others, especially if they’re exposed to the elements. For instance, pavers and other paving materials will likely need periodic sealing or treatment to keep them looking their best.
Another consideration when designing a hardscape is how it will affect the surrounding environment, particularly water flow and drainage. Proper drainage is essential to avoid standing water and erosion issues, so it’s important to consider the slope of your land when determining where to place hardscape elements. It’s also a good idea to incorporate permeable hardscape where possible to reduce the amount of runoff water leaving your property and potentially polluting local waters.
It’s also a good idea to integrate softscape elements like flowers, grasses and shrubs into your hardscape design where possible. This can help to soften the look of pathways, walls or retaining walls and can be used to frame and highlight hardscape features like fountains or gardens. Choosing plants that grow well in your climate and soil conditions will also ensure that your softscaping is able to thrive, adding year-round interest and beauty to your landscape.