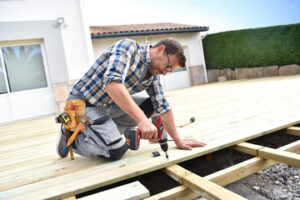
Deck building is a full-fledged construction project, using many different types of lumber. The underlying structure is made up of joists, beams, and posts.
Moisture accumulation and termite infestation can damage decking. Proper drainage, regular inspections, and preventive treatments can help avoid these problems. Water damage can also lead to wood rot, which weakens the deck’s structural integrity. Contact Nashville Deck Builders for professional help.
Posts support the deck’s beams and provide stability. They are spaced at regular intervals around the perimeter of the deck, depending on the size of the deck and your personal style. Some builders use posts as a frame for stairs, railings or other features that require more structural strength than the floor framing (rim joists, end joists and floor joists). In most cases, 4×4 posts are sufficient to support a deck up to 6 feet in height, but taller decks need stronger, larger posts. As a general rule, posts should be at least twice as long as the joist span they are supporting.
Deck posts may be buried in concrete footings or supported by pier blocks. Pouring concrete footings requires digging below the frost line, setting forms and pouring concrete. This process is labor intensive, but provides a strong and durable base for the deck.
Precast pier blocks are a faster and easier alternative to poured footings. They are available in several sizes to accommodate various post sizes. They set on the ground and come with holes for attaching posts. Pier blocks also raise the bottom of the post slightly above the footing, which helps prevent water damage. Some pier blocks even include post anchors, metal framing connectors that secure the posts to the pier block.
In some situations, it is preferable to repair a damaged or rotting post rather than replacing it completely. This can be particularly appropriate if the post supports a hot tub or other structure with high static loads, or if it is decorative and would be difficult to find an exact replacement.
To repair a rotted post, first cut away the damaged portion of the post. Then clean the area and remove any debris that might obstruct access to the underlying concrete. If necessary, support the deck using jacks or braces to relieve pressure from the existing post and allow you to excavate and replace the post. When you install a new post, be sure it is pressure-treated wood to ensure longevity and durability. To attach the post to the deck beams, use code-approved metal post-to-beam connectors that attach the posts to the beams with through bolts.
Beams
A beam is a horizontal framing member that supports decking. Its size is determined by the design and load of the deck and must meet local building codes. A 2 x 6 to 2 x 10 is an appropriate beam for most residential decks. However, a larger beam may be required for high-load areas. To help you determine the appropriate size for your deck beam, check out Western Wood Products’ beam and joist sizing calculator.
For a pier or pad-supported deck, the beam–usually a double 2-by–can bear directly on the poured concrete pier or pad and stay close to grade. This method makes it easier to backfill soil against the joists, but it can leave the deck looking clunky.
On a post-on-beam deck, the posts can support a single-span beam that’s anchored to a concrete footing. If you choose this method, dig a hole for each post and set it in the footing, then cover it with gravel and tamp it well. Then, place a post base on each footing to strengthen the connection with the concrete and help prevent uplift caused by winds.
The rim joists (the outer-most joists on either side of the ledger) and the beam are supported by 2 x 4s. To prevent rot and joist hangers from weakening the structure, it’s important to use pressure-treated lumber. You should also install a drip edge to keep water from draining down the side of the deck and not against the structure.
Deck joists are typically 2 x 6- through 2 x 10-inch boards that span between the beams. To make a strong, long-lasting deck, it’s important to nail the joists together using proper fasteners and techniques. Installing joist hangers on the end of each joist helps transfer the loads to the beams and avoid buckling or warping.
If the joists aren’t properly supported, the deck could be unsafe and prone to sagging or spalling, in which the mud cap degrades from a weak concrete/mortar bond or expansive soil pushing against the side of the joist. To protect against this, it’s essential to follow the deck-building guidelines for your area and to use a good-quality construction adhesive. You should also use paint-grade trim boards to conceal the fasteners and finish nails.
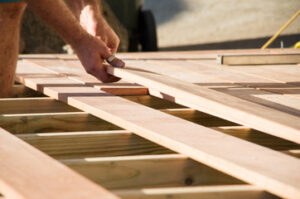
Joists
Joists are the horizontal beams that support the decking. They must be properly spaced to ensure the structural integrity of your deck. You can use a timber design software such as Hyne Design or consult a professional to determine the appropriate spacing between bearers and joists based on the size and load requirements of your deck. A common maximum joist spacing is 16 inches on-centre, but this may vary depending on the type of decking and the anticipated load.
In addition to proper spacing, you should also use corrosion-resistant screws to fasten the joists. This helps to prevent the wood from loosening over time, which can compromise the strength of your deck. Make sure the screws are at least 3” long so they can penetrate wall studs and joists on either side of it.
If you’re building a new deck, it’s important to choose the right lumber for your project. Look for lumber with the highest copper preservative content if possible, and consider using pressure-treated joists for maximum durability. Also, be sure to install a well-functioning under-deck drainage system to keep moisture and debris away from the joists.
For existing decks, you can repair damaged joists by splicing them together or adding supports called cleats to the damaged areas. You can also install a new ledger to replace the existing one if necessary. To splice joists, first mark the location of the joists on both the bearer and ledger boards. Afterwards, nail the joists together with 8d galvanized nails. You should also install blocking between joists wherever required.
You should always use a level and a tape measure to ensure that all of the joists are level. This will help to ensure a smooth and even finish. In addition, you should also check the joists for damage and signs of rot, such as water stains or softness. If you see any of these issues, you should take steps to correct them immediately.
If the joists are damaged, you can add support cleats or sister joists to the existing joists to increase their strength and prevent further damage. If the joists are rotting, you can apply a fungicide to protect them from fungi growth and repair any damage.
Railings
The railings of a deck help create a safe environment for people to enjoy their outdoor space. They are also important for providing safety when the deck is high off of the ground, as they prevent people from falling over the side of the deck. Performing regular inspections and repairs of your deck and railings is an important step in keeping them safe. In some cases, the railings may loosen or become damaged, creating a safety hazard for your family and friends.
The most common type of railing for a deck is made from wood. It offers a natural aesthetic that bridges the indoor and outdoor spaces, and it’s generally less expensive than other types of railing. However, wood is prone to rot and requires consistent maintenance. Additionally, it can be damaged by strong winds that cause the balusters to shift and become loose.
Loose deck railings can be a safety hazard, especially if they are near stairs. If you notice that your deck’s railing is loose, tighten all the screws and bolts as much as possible. If this doesn’t help, you may need to add wood blocks or stiffeners to the railing posts to make them stronger.
You can also upgrade your deck railing to add strength and a fresh look. Composite materials like TimberTech offer color options that mimic the look of real wood, and metals like stainless steel fight rust and last long. Additionally, glass panels provide a clear view and can be customized to fit your personal style.
In addition to repairing loose connections, you can strengthen your deck railings by adding railing brackets to transfer the pressure from the railing to the joists. You can also use a rail cap to make the deck railing more aesthetically pleasing.
Once your deck is secure, you can complete its appearance by installing weather-resistant furniture and accessories, such as cushions and throws. You can also add planters, built-in seating, or a pergola to enhance your backyard garden or outdoor living area. In addition, a well-maintained deck can boost your property value.